





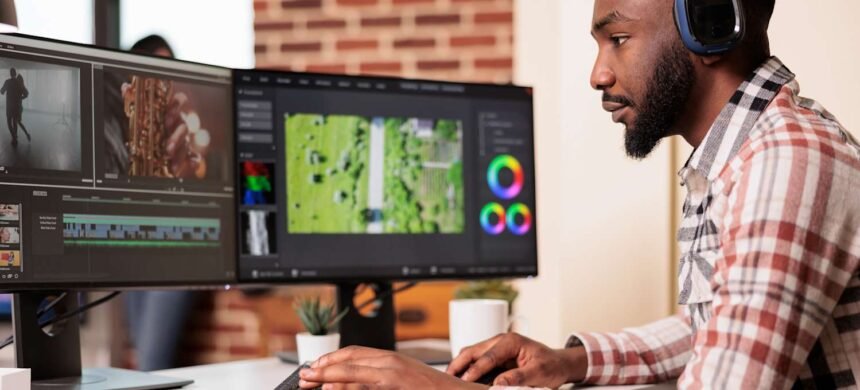
The good news is that you no longer need a film-school education to produce polished videos. Modern editors provide drag-and-drop timelines, templates, automatic captions, color correction, background-noise reduction, and AI-assisted editing. The challenge is choosing software that is easy enough to learn without becoming too restrictive as your skills improve.
Whether you are creating affiliate product videos, YouTube tutorials, travel highlights, business presentations, or social-media clips, one of the following tools should fit your workflow.
Video-Editing Software Compared
| Editor | Ideal user | Platforms | Learning curve | Payment model |
|---|---|---|---|---|
| Microsoft Clipchamp | First-time and occasional editors | Web and Windows | Very easy | Free tier and premium features |
| Wondershare Filmora | YouTubers and social creators | Windows and macOS | Easy | Paid plans and license options |
| DaVinci Resolve 21 | Creators who want room to grow | Windows, macOS, and Linux | Moderate | Powerful free version and paid Studio edition |
| Adobe Premiere | Professionals and content teams | Windows and macOS | Moderate to advanced | Subscription |
| Apple Final Cut Pro | Mac and iPad creators | macOS and compatible iPads | Moderate | Mac one-time purchase or Creator Studio subscription |
Microsoft Clipchamp: Start Editing Without a Complicated Setup
Microsoft Clipchamp is an accessible starting point for someone editing a first video. It works in a supported web browser and is also available as a Windows application.
The interface follows a familiar drag-and-drop design. Import your footage, place clips on the timeline, trim unwanted sections, add text or music, and select an export setting. Templates help create videos for YouTube, LinkedIn, TikTok, Instagram, presentations, and other common formats.
The free tier includes basic editing tools, free stock assets, automatic subtitles, AI voiceovers, silence removal, and exports of up to 1080p without a watermark when only free features and assets are used. Premium plans add 4K exporting, premium stock content, expanded effects, and additional brand tools.
Clipchamp is ideal for short product demonstrations, slideshows, business updates, and social videos. It becomes less suitable when you need intricate color grading, advanced audio mixing, complex motion graphics, or large multi-camera productions.
Choose Clipchamp if: You want to complete a straightforward video quickly without learning professional editing terminology.
Wondershare Filmora: Beginner-Friendly with More Creative Control
Wondershare Filmora offers a more capable timeline while remaining approachable for beginners. Its layout makes it relatively easy to import clips, add transitions, insert titles, adjust speed, and layer music or graphics.
Filmora includes a large selection of filters, effects, stickers, templates, and animated titles. Its AI-assisted features include automatic captions and tools that can accelerate repetitive editing tasks. This makes it attractive to YouTubers, affiliate marketers, educators, and social-media creators who want eye-catching results without building every effect manually.
The software also provides keyframing, motion tracking, multicamera editing, masking, color adjustments, and other features that allow users to progress beyond simple cutting.
Be careful when choosing a plan. Some AI functions may use credits, asset libraries can have separate licensing conditions, and trial exports may carry restrictions or watermarks. Review the current plan details before committing to a particular workflow.
Choose Filmora if: You want an easy editor with templates, effects, and enough advanced tools to support growing content channels.
DaVinci Resolve 21: Professional Power with an Exceptional Free Version
DaVinci Resolve 21 combines editing, color correction, visual effects, motion graphics, and audio post-production in one application. It runs on Windows, macOS, and Linux.
The free version can handle projects at up to Ultra HD 3840 × 2160 and 60 frames per second. For many YouTube channels, documentaries, interviews, travel videos, and business productions, that is more capability than most users will ever need.
Resolve divides its workflow into specialized pages. The Cut page is intended for faster editing, the Edit page provides a traditional timeline, Fusion handles visual effects and motion graphics, Color contains professional grading tools, and Fairlight manages audio.
This structure initially appears more complicated than Clipchamp or Filmora. Beginners do not need to learn every page at once. Start with the Cut or Edit page, basic audio controls, and the Deliver page for exporting. The other tools can be introduced as your projects become more ambitious.
The paid Studio edition adds more effects, advanced AI and neural-engine features, expanded HDR tools, additional format support, noise reduction, and higher-end production capabilities.
Resolve benefits from a reasonably powerful computer. When editing 4K footage on modest hardware, create proxy media—lower-resolution working copies that make playback smoother while preserving the original files for final export.
Choose DaVinci Resolve if: You want professional software with a generous free version and are willing to spend time learning it.
Adobe Premiere: A Flexible Standard for Professional Work
Adobe Premiere is a versatile editor used for online content, advertising, documentaries, television, corporate media, and collaborative production.
Its traditional track-based timeline provides precise control over clips, audio, titles, effects, and multicamera footage. It also integrates with Adobe applications such as After Effects, Photoshop, Audition, and Frame.io.
Premiere’s Text-Based Editing can generate a transcript and let you build or refine an edit by working with the text. Removing a sentence, pause, or filler word from the transcript can remove the corresponding part of the video. This is particularly useful for interviews, tutorials, podcasts, and talking-head content.
Media Intelligence can help search footage using descriptions of objects, locations, and framing. Generative Extend can add a limited number of frames or extend ambient audio when a clip ends slightly too early. Some generative features require credits and an eligible plan.
Premiere is not the cheapest option because it uses a subscription model. It also requires more learning than Filmora or Clipchamp. Its value becomes clearer when video is an important part of your business, you collaborate with other professionals, or your workflow already relies on Adobe Creative Cloud.
Choose Adobe Premiere if: You need an industry-established editor, sophisticated collaboration, and integration with other Adobe tools.
Final Cut Pro: Fast Editing for the Apple Ecosystem
Final Cut Pro is Apple’s professional editor for Mac and compatible iPads. It is optimized for Apple hardware and can provide exceptionally smooth playback and exporting on modern Apple-silicon devices.
Final Cut Pro uses a Magnetic Timeline, which automatically keeps connected clips, titles, and audio attached as the main storyline changes. This can make rearranging a project faster once you understand Apple’s editing approach.
The software includes color grading, audio editing, titles, transitions, effects, object tracking, captions, multicamera tools, and intelligent features built around Apple technologies. Existing iMovie users can also import their projects and continue editing with more advanced controls.
On Mac, Final Cut Pro remains available as a one-time purchase. It is also included in the Apple Creator Studio subscription, which bundles it with applications such as Logic Pro, Pixelmator Pro, Motion, and Compressor. Some premium content is reserved for Creator Studio subscribers, while existing one-time-purchase users continue receiving application updates.
The biggest limitation is platform lock-in. Final Cut Pro is designed for Apple devices, making project exchange with Windows-based editors less convenient.
Choose Final Cut Pro if: You use a Mac, value fast performance, and prefer either a one-time purchase or Apple’s broader creator bundle.
How to Turn Raw Clips into a Finished Video
1. Decide where the video will be published
A horizontal YouTube video, vertical Reel, square advertisement, and widescreen presentation require different project dimensions. Establish the destination before editing so that important subjects, captions, and graphics remain inside the visible frame.
2. Back up the original footage
Copy camera cards and phone footage to at least two locations before editing. Do not edit directly from the only memory card containing your recordings. An external SSD can provide faster, more reliable access than a slow USB drive.
3. Organize files before importing
Create separate folders for video, audio, music, photographs, graphics, project files, and exports. Rename important clips with meaningful descriptions instead of relying entirely on filenames such as IMG_4837.MOV.
4. Build the rough cut
Place only the essential scenes on the timeline. Concentrate on the message and sequence rather than effects. If a clip does not advance the story, explain something useful, or create an intentional emotional moment, remove it.
5. Add supporting footage
B-roll is footage placed over narration or an interview. In a product review, it may show ports, controls, packaging, or the product in use. B-roll hides cuts and gives viewers visual evidence for what the presenter is describing.
6. Clean up the audio
Dialogue should remain clear and consistent. Reduce background noise carefully, remove obvious distractions, and lower music whenever someone speaks. Listen through headphones as well as ordinary phone or laptop speakers.
7. Correct the color
Color correction fixes exposure, white balance, and mismatched shots. Color grading adds a creative look. Correct the image first; dramatic presets cannot rescue badly exposed footage and may make skin tones appear unnatural.
8. Add titles and captions
Use simple, readable fonts with strong contrast. Keep text away from screen edges and avoid covering important details. Automatically generated captions save time, but names, technical terms, and punctuation should always be checked manually.
9. Export and review
For broad online compatibility, H.264 video in an MP4 container is a sensible default. Export at the same frame rate as the main footage and use 1080p unless the platform, client, or project genuinely benefits from 4K.
Watch the completed export from beginning to end. Editing previews can conceal missing media, silent audio, caption errors, or transitions that do not render correctly.
Computer Specifications That Affect Editing
Video editing places substantial demands on memory, storage, the processor, and graphics hardware. A fast SSD improves file loading and caching, while additional memory helps when working with 4K footage, multiple applications, or complex effects.
If playback stutters, do not immediately replace your computer. Try generating proxy files, reducing preview quality, closing background applications, and moving source footage to a faster drive. Editing proxies can make demanding footage manageable even on a modest system.
Music, Stock Footage, and Copyright
Never assume that music is free to use because it appears on YouTube, TikTok, or a stock-media website. Use material you created, content in the editor’s licensed library, or assets covered by a suitable commercial license.
“Royalty-free” does not necessarily mean free of charge or free from conditions. Some licenses restrict paid advertising, client projects, broadcasting, or use after a subscription ends. Save receipts, license certificates, and screenshots of the applicable terms.
The same caution applies to AI-generated video, voices, music, and images. Check the tool’s commercial-use terms and avoid generating recognizable people, brands, characters, or copyrighted styles without appropriate rights.
Frequently Asked Questions
Which editor should a complete beginner use?
Clipchamp is the easiest place to start for basic videos. Filmora offers more creative tools while remaining approachable. Beginners willing to follow structured tutorials can also start directly with DaVinci Resolve.
Can I edit professional videos for free?
Yes. The free version of DaVinci Resolve provides professional editing, color, audio, and effects tools. Clipchamp also allows free 1080p exports for simpler projects when only included free features and assets are used.
Do I need to edit in 4K?
No. A well-shot and well-edited 1080p video is sufficient for most websites, affiliate content, tutorials, and social platforms. Editing in 4K requires more storage and processing power.
What is the difference between trimming and cutting?
Trimming changes the beginning or end of a clip. Cutting or splitting divides a clip into separate sections, allowing unwanted material to be removed from the middle.
Final Recommendation
Start with Clipchamp if you need a simple editor for occasional videos. Choose Filmora when you want templates, effects, captions, and a friendlier path toward more advanced editing.
DaVinci Resolve 21 offers the strongest long-term value for creators prepared to learn a professional application. Adobe Premiere is better suited to established production workflows and teams already using Creative Cloud. Final Cut Pro is the natural choice for Mac users who value speed, Apple optimization, and a one-time-purchase option.
The editor matters, but the story matters more. Clean audio, purposeful cuts, useful supporting footage, readable captions, and disciplined organization will improve a video more than filling the timeline with transitions and effects.